

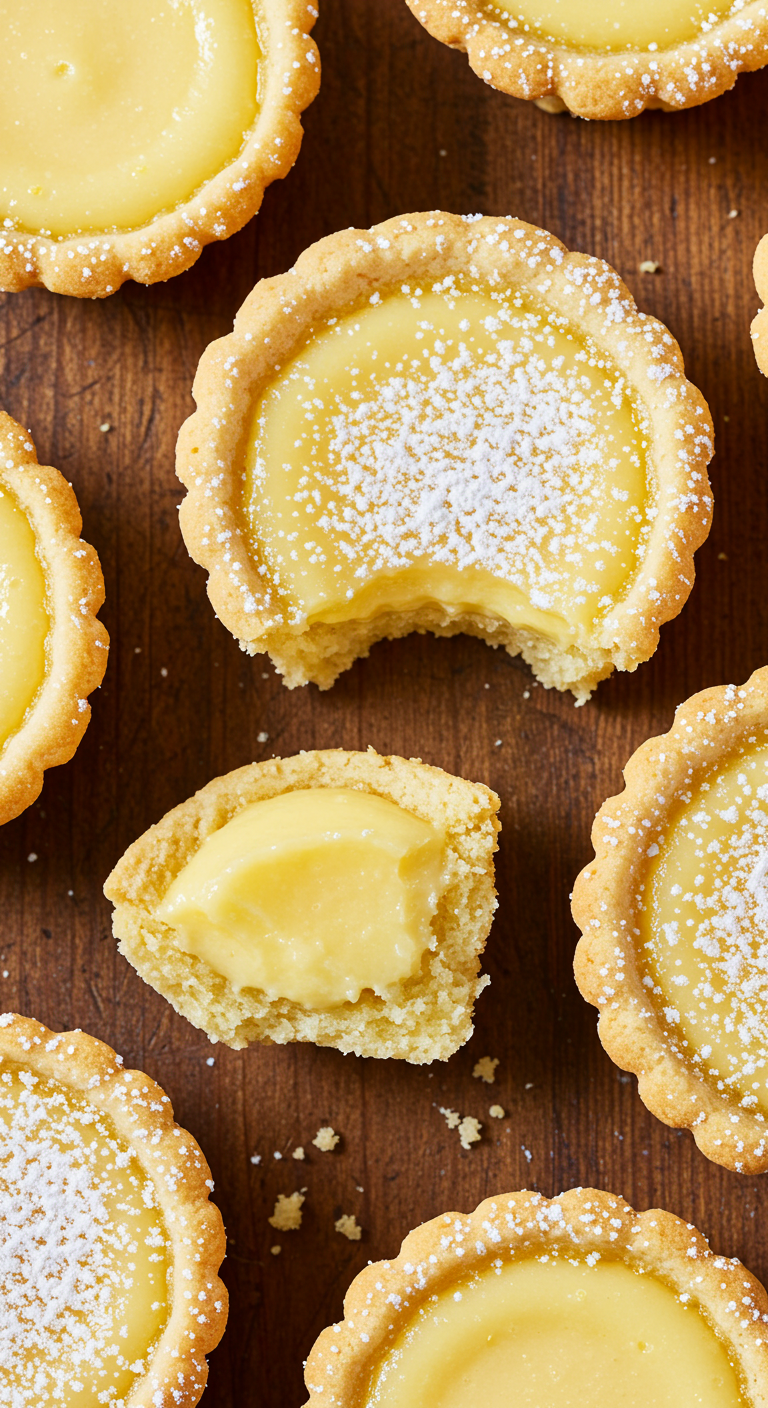

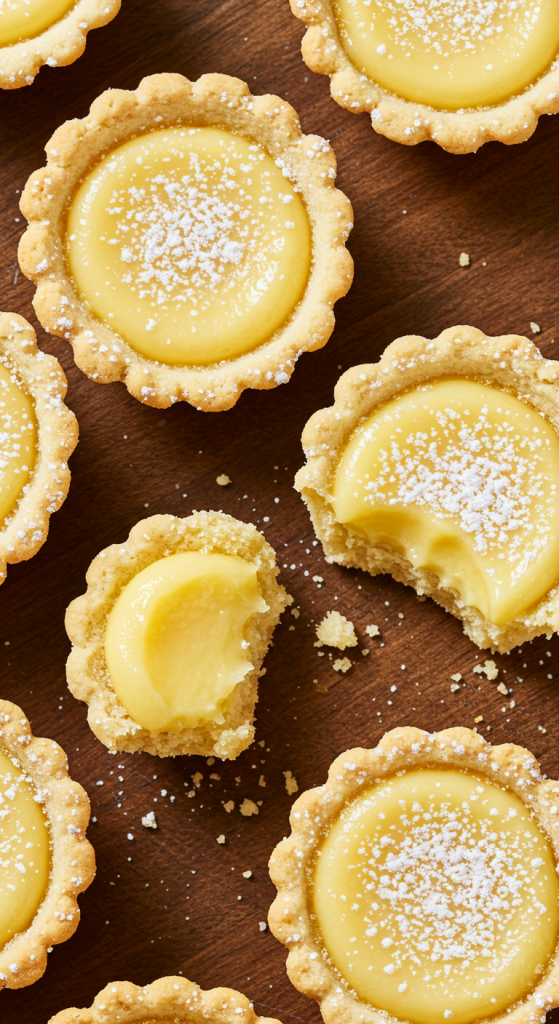
I’ve made a lot of desserts over the years, but these Baby Lemon Impossible Pies might just be the most magical little treats in my recipe box. They’re sweet, tart, creamy, and just the right size to satisfy a lemon craving without overindulging. What’s even better is how effortlessly they come together. You get all the flavor and charm of a custard pie, but without the fuss of multiple steps or fancy techniques.
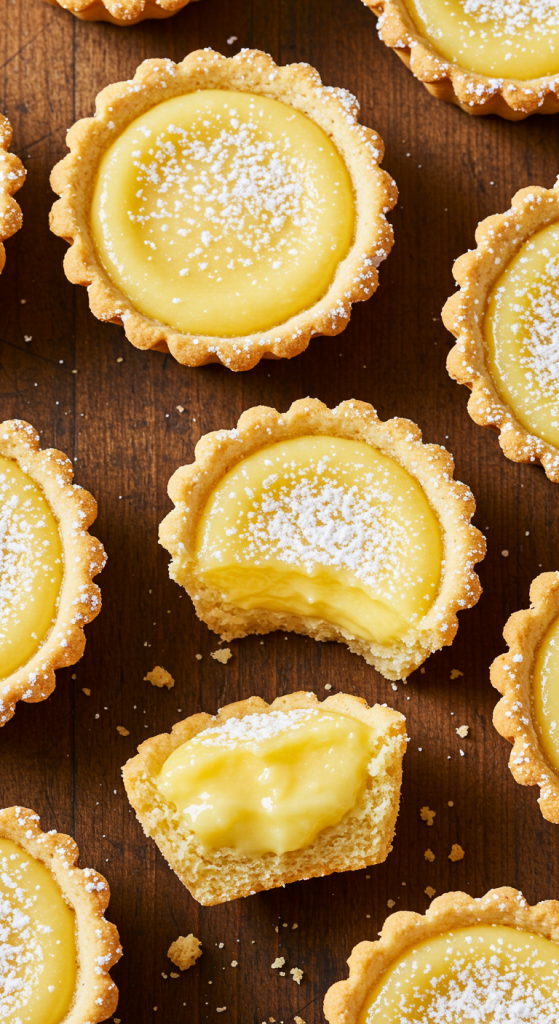
The first time I baked a batch of these, I was amazed by how the layers separate beautifully on their own as they bake: the crust forms at the bottom, the lemony custard rises in the middle, and the glossy golden top sets just perfectly. It feels like baking alchemy every single time. And let me tell you, they make your kitchen smell like sunshine.
I love serving these at brunches, family get-togethers, and sometimes just as a midweek pick-me-up with my afternoon tea. The size makes them portable and easy to share, though I’d be lying if I said I’ve never eaten three in a row by myself.

Why You’ll Love This Baby Lemon Impossible Pies Recipe
These pies are a delightful twist on traditional lemon tarts. They require no pie dough or pastry-making skills, which makes them perfect for beginners or anyone short on time. Everything goes into a blender or bowl, and the oven does the rest of the magic.
The texture is creamy and tender with a gentle zing from fresh lemon juice and zest. They’re elegant enough for holidays and easy enough for a weekend treat. Plus, they’re freezer-friendly and make excellent little gifts. If you love lemon bars or custard pies, you will absolutely fall head over heels for these bite-sized wonders.
How to Make the Baby Lemon Impossible Pies
Step 1: Preheat and Prepare
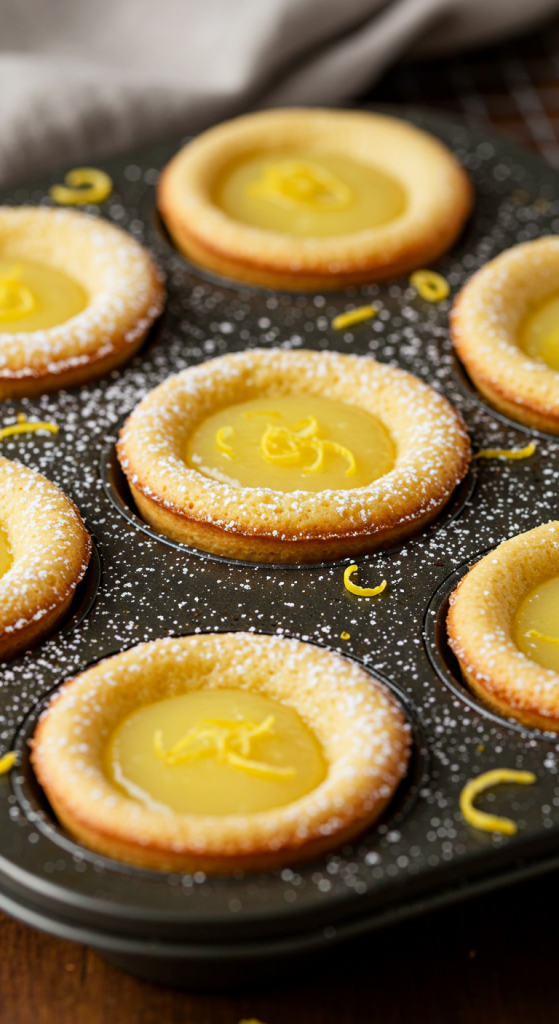
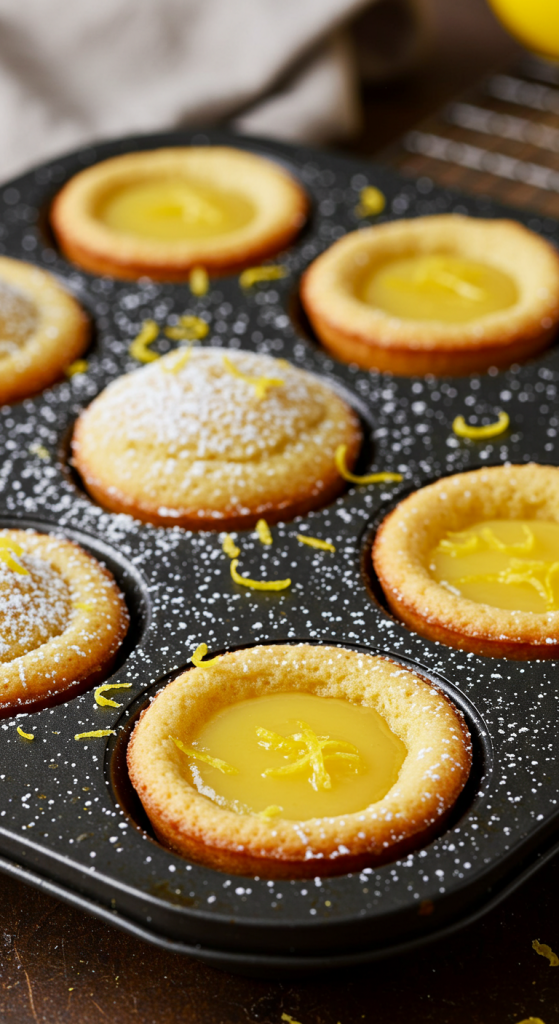
Start by preheating your oven to 350°F (175°C). Lightly grease a muffin tin or line with cupcake liners. I prefer silicone molds for easy removal, but any muffin tin will work.
Step 2: Blend the Batter
In a blender or mixing bowl, combine the following: eggs, granulated sugar, melted butter, all-purpose flour, whole milk, lemon juice, lemon zest, vanilla extract, and a pinch of salt. Blend or whisk until smooth. The batter will be quite thin, and that’s completely normal.
Step 3: Pour and Bake
Evenly divide the batter among the muffin cups, filling each about 3/4 full. Bake in the center of the oven for 25 to 30 minutes. You’ll know they’re ready when the tops are lightly golden and they have a gentle jiggle in the center. Don’t overbake, as they’ll continue to set as they cool.
Step 4: Cool and Dust
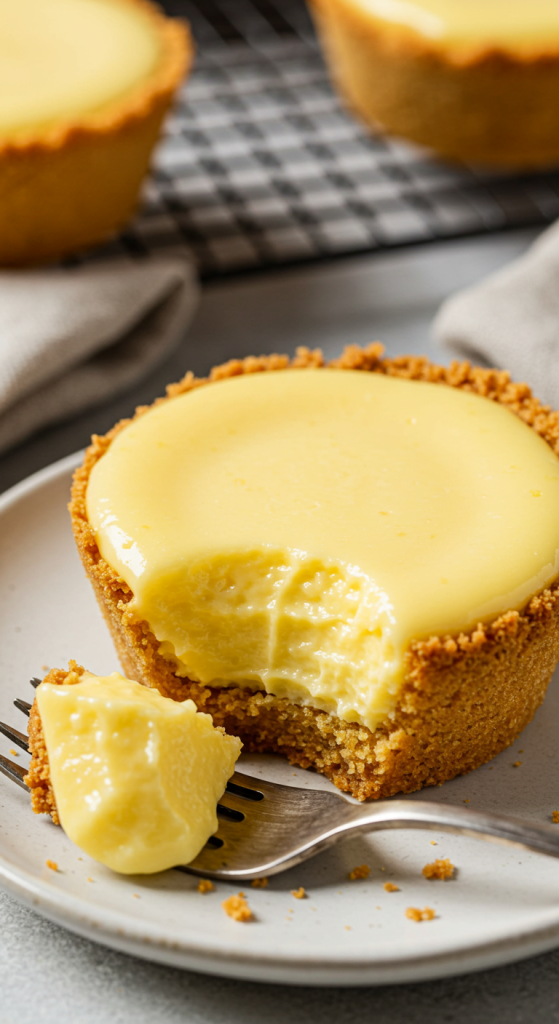
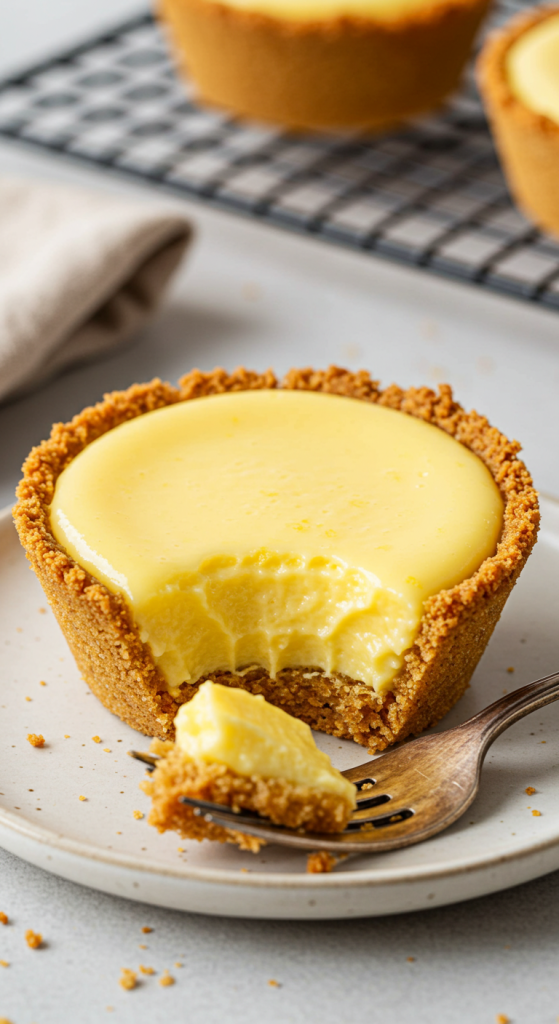
Let the pies cool in the pan for about 10 minutes before transferring them to a wire rack. Once completely cool, dust with powdered sugar. They’re also lovely topped with a curl of lemon peel or a dollop of whipped cream.
Recipe Variations and Possible Substitutions
If you’re feeling adventurous, there are a few ways you can make this recipe your own. You can use lime juice and zest for a tropical twist, or even orange for a sweeter, softer citrus flavor. Coconut milk makes a great dairy-free substitute, though it will slightly alter the texture.
For a gluten-free version, swap the all-purpose flour with a gluten-free flour blend that contains xanthan gum. I’ve also tried using almond flour with good results, though it yields a denser texture. If you want to reduce sugar, use a granular sugar substitute like erythritol.
And if you’re out of fresh lemons, bottled lemon juice works in a pinch—just add a bit more zest or a drop of lemon extract to boost the flavor.
Serving and Pairing Suggestions
These baby lemon pies are versatile enough to suit nearly any occasion. I often serve them at room temperature, but they’re just as good chilled, especially on a warm day. A light dusting of powdered sugar is classic, but you can elevate them with a dollop of vanilla whipped cream or a small spoonful of lemon curd if you’re feeling fancy.
For pairings, a cup of Earl Grey or green tea complements the citrus flavor beautifully. If you’re entertaining, these little pies go well on a dessert table with fresh berries, berry coulis, or alongside shortbread cookies. The contrast in texture and flavor makes the whole spread feel thoughtful and elegant.
Storage and Reheating Tips
These mini pies store well in the fridge for up to 5 days. Just place them in an airtight container, separating layers with parchment paper to avoid sticking. They also freeze beautifully. I wrap them individually in plastic wrap and then place them in a zip-top freezer bag. They’ll keep for up to 2 months.
To enjoy from the freezer, thaw overnight in the refrigerator or let them sit at room temperature for an hour. You can also warm them slightly in the microwave for about 10-15 seconds if you prefer them a little warm and soft.
Frequently Asked Questions
Can I make these in a regular pie pan?
Yes, you can bake this as a single pie in a standard 9-inch pie dish. Just adjust the baking time to 45 to 50 minutes and check for doneness in the center.
What if I don’t have a blender?
No worries! You can mix everything by hand or with a handheld mixer. Just make sure everything is well-combined and smooth.
Why are my pies too soft in the center?
That usually means they were slightly underbaked. They should jiggle a little in the middle when you take them out, but they’ll firm up as they cool.
Can I add toppings before baking?
I don’t recommend it, as the batter is very light and toppings may sink. It’s better to add whipped cream, powdered sugar, or fruit after baking.
Are these safe to eat warm?
Absolutely. Just be sure they’ve set enough to hold their shape. Warm pies are especially delicious with a scoop of vanilla ice cream.
Related Recipe You’ll Like
If these Baby Lemon Impossible Pies won your heart, you’ll also enjoy the luscious simplicity of this Ooey Gooey Butter Cake. It’s another magic-layered treat that bakes into a dreamy texture. For a citrusy brunch addition, try the Classic Caprese Salad Recipe to start light and finish sweet. And don’t miss out on Butter Pecan Pound Cake if you love rich, buttery desserts.
Save and Share This Recipe for Later
Don’t forget to save this Baby Lemon Impossible Pies recipe for the next time you need a quick and crowd-pleasing dessert. Pin it to your favorite Pinterest board so you can find it anytime. If you loved it, share the recipe with your friends on Facebook or tag me on Instagram with your baking photos. Word of mouth means the world, and nothing makes me happier than seeing these pies make their way into your kitchens.
Baby Lemon Impossible Pies

These Baby Lemon Impossible Pies are a magical dessert that forms their own layers as they bake: a light crust on the bottom, a creamy lemon custard center, and a golden top that sets perfectly. Made with simple ingredients and no need for a separate crust, they come together effortlessly in one bowl or blender. The bright citrus flavor is balanced with just the right amount of sweetness, making them ideal for spring gatherings, afternoon tea, or an anytime treat. Their small size makes them perfect for sharing, gifting, or stashing in the freezer for lemony cravings on demand.
Ingredients
- 2 large eggs
- 1 cup granulated sugar
- 1/2 cup unsalted butter, melted
- 1/2 cup all-purpose flour
- 1 cup whole milk
- 1/4 cup fresh lemon juice (about 2 lemons)
- 1 tablespoon lemon zest
- 1 teaspoon vanilla extract
- Pinch of salt
- Powdered sugar for dusting (optional)
Instructions
- Preheat oven to 350°F (175°C). Grease a 12-cup muffin tin or use cupcake liners.
- In a blender or mixing bowl, combine eggs, sugar, melted butter, flour, milk, lemon juice, lemon zest, vanilla, and salt. Blend or whisk until smooth.
- Pour the thin batter evenly into the muffin cups, filling each about 3/4 full.
- Bake for 25-30 minutes until tops are golden and centers are just set with a slight jiggle.
- Let cool in the pan for 10 minutes, then transfer to a wire rack to cool completely.
- Dust with powdered sugar before serving, if desired.
Notes
- Fresh lemon juice and zest give the best flavor, but bottled lemon juice works in a pinch.
- These pies can be frozen for up to 2 months; thaw in the fridge or at room temp before serving.
- For a dairy-free version, substitute coconut milk and vegan butter.
- Don’t overbake; they continue to set as they cool and should remain slightly soft in the center.
